Showing posts with label breads. Show all posts

Wednesday, January 11, 2012

Pepperoni Pizza Puffs

I found this recipe via Pinterest a couple days ago and made these for my husband as a "football food." They were very yummy, super-easy, and rather fancy looking! I am definitely adding this to my "go-to" list of foods to make for special occasions such as showers, reunions, potlucks and other get-togethers. 


Pepperoni Pizza Puffs

3/4 c.  all purpose flour
3/4 tsp. baking powder
1 T. Italian seasoning
pinch of salt
pinch of red pepper flakes (optional)
3/4 c. whole milk
1 egg, lightly beaten
1 c. shredded mozzarella cheese
1/4 c. grated Parmesan cheese
1 c. cubed pepperoni
1/2 c. pizza sauce
 
Spray a 24 cup mini-muffin pan with non-stick spray and preheat oven to 375 degrees. Combine flour, baking powder, Italian seasoning, salt and red pepper flakes with a whisk.  Add milk, egg, cheeses and pepperoni and blend thoroughly. Spoon out into muffin pan and bake for about 25 minutes.  Serve warm with heated pizza sauce for dipping.
 
 
The center is moist and cheesy, and the red pepper flakes add a dash of heat and sophistication.
 
 
*This recipe comes from a blog called Sweet Tea & Stilettos.

Sunday, April 24, 2011

Granny's Biscuits

Hi, everyone! I have been so busy for a couple weeks now and it has me seriously behind on my blogging.  I guess you could say I've had spring fever lately and it's kept me busy with all kinds of stuff.

One of my favorite things to make, regardless of what the item actually is, is something that reminds me of someone.  Food has a way of taking you to a happy place filled with love and memories of people that you have cared about.  As I have said before, there are a million ways to make biscuits and it seems that every cook has her own, unique, trademark way of doing it.  Granny's biscuits are no exception.

Granny's biscuits are one-of-a-kind and oh-so-good!
Granny's biscuits are very unique; I have never known anyone to make them the way she did, and she said that she didn't either.  As a rule, biscuits are simply a mixture of flour, baking powder, salt, milk and fat.  Granny however, simply used self-rising flour (which already includes the baking powder and salt) and buttermilk.  That's it!  And they are soo good! She claimed that she came upon making them that way accidentally as she and my grandfather (who was slowly dying of heart failure) had very little money after my grandfather could no longer work.  She said she just started leaving the fat out of the biscuits in order to conserve resources, and had no idea that she was creating a masterpiece in the process!  So, here's the recipe:

Granny's Biscuits

2 c. self-rising flour (plus more for handling)
1 c. buttermilk (approximately)
About 2-3 T. oil

Preheat oven to 450 degrees.  In a large, cast-iron skillet (or an old-fashioned black bread tin, if you happen to have one) pour enough oil to coat the bottom of the skillet or tin. Pour off any excess. (There should be a generous amount of oil in the skillet, but you don't want any to be standing.) In a mixing bowl, pour buttermilk into flour all at once, and stir vigorously until blended.  Be careful to not over-beat.  Turn out onto generously floured surface and sprinkle with flour.  Dip hands into flour, and using index fingers, pinch off enough dough for one biscuit.  Roll gently between hands to form and then lay in skillet.  Repeat with remaining dough.  Using a spoon, coat biscuit dough individually with oil, but be careful to remove any excess oil that may run-off and pool up between biscuits. (The idea is to make sure biscuits are well-coated on all sides with oil, but not soaking in it.)  Place in oven and bake for about 10-12 minutes or until well-browned on top.  Remove immediately and serve hot.  These are especially good with homemade apple butter. 


If you're like me, and you like the crunchy part of any bread, you can also fix yourself an individual "biscuit" by using a separate skillet and patting out about 2 biscuits worth of dough in it like you would pat out a pizza crust.  It will bake up crisp and delicious!!!

The interesting thing about her biscuits is that they are crunchy on the outside (due to the oil basically frying the dough) and very moist and chewy on the inside.  I promise they are unlike any you have ever had, but if you make them right, you will be making them again. 


Wednesday, March 30, 2011

Pineapple Breakfast Muffins

I had some crushed pineapple left over from my pineapple & ham pizza, so I thought I would throw it into some muffins for a tasty, quick morning snack.   If you don't like pineapple, you could always substitute in your favorite fruit.  These muffins are incredibly light and moist! They go just perfect with your morning coffee!

These muffins are very light and delicately textured.


Pineapple Breakfast Muffins

2 c. all-purpose flour
3 tsp. baking powder
1/2 tsp. salt
1/2 c. sugar
1 c. milk
4 T. melted butter
1 egg
3/4 c. crushed pineapple

Preheat oven to 400 degrees. Line muffin tin with paper liners or generously grease.  Combine all dry ingredients; then add milk, butter, egg and crushed pineapple. Stir until combined.  Batter will be lumpy.  Fill muffin tins until 2/3 full.  Bake about 15-20 minutes or until delicately browned on top.  Serve hot with butter if desired.  Makes 12 average-sized muffins.


Substitute the pineapple with your favorite fruit if desired.

Thursday, March 24, 2011

Homemade Pineapple & Ham Pizza

Pineapple and ham--my favorite!
I hope you all like my new layout as much as I do.  It isn't that I didn't like the other one, but I just wasn't satisfied with it somehow or other. I couldn't ever really put my finger on what it was that I thought wasn't just quite right; I really love this one, though!

This evening for supper I made pizza.  Pizza is one of my go-to meals, because I always have the ingredients on hand, and it doesn't take long to make. It's also cheaper (and better!) than the frozen ones which I usually try to keep on-hand for whenever I really just don't feel like making anything.  Of course, you could always substitute your favorite toppings (i.e. green peppers, pepperoni, hamburger, onions, black olives, mushrooms, sausage, etc.)  in place of the pineapple and ham if you aren't a fan of it.  We, however, like to mix it up now and then so that "pizza" doesn't just mean cheese and pepperoni. This is  how I make my pineapple and ham pizza:

Pizza Crust

2 c. all-purpose flour
1 T. or 1 pkg. rapid rise yeast
1 tsp. salt
2 T. sugar
2 T. oil
3/4 -1 c. hot tap water

Combine flour, yeast, salt and sugar in mixing bowl.  Add oil and hot tap water; beat well. (Add 3/4 c. water at first, then more if needed to thin the dough.) Dough should be soft, but be able to hold its shape.  Cover with a towel and let rest 10 minutes.  Punch down, turn-out on generously floured surface and knead about 1 minute or until dough is firm.  Pat out into greased pan(s).  Bake at 350 degrees until crust is just set, but not browned.  Spread with favorite toppings and bake at 425 degrees for about 17-20 minutes, or until cheese is melted and crust is slightly browned.  Cut and serve hot.  (My mom uses this recipe for two crusts; I prefer a thicker crust, so I use this for only one pizza.)

Pizza Sauce

1 (8 oz.) can of tomato sauce
1/2 tsp. salt
dash of pepper
1/2 T. sugar
pinch of garlic powder
1tsp. basil
1-1 1/2 tsp. oregano

Combine all ingredients in small bowl and spread on prepared pizza crust.  Top with cheese and topping of choice. (Since I was making a pineapple and ham pizza, I added an additional 1/2 tablespoon of sugar to my sauce to sweeten it up a bit.)

Toppings

3 c. shredded mozzarella or Italian blend cheese
1 (8 oz.) can diced or crushed pineapple (without juice)
6 pieces of Canadian bacon, sliced
Parmesean cheese

Spread cheese evenly on top of prepared crust. Then distribute pineapple and Canadian bacon evenly on top of cheese.  Cover with additional shredded cheese if desired, and sprinkle Parmesean on top of this.  Bake at 425 degrees for about 17-20 minutes or until cheese is melted and crust is browned.


Also: Try making individual, deep-dish pizzas in cast iron skillets sometime! They make for an extremely good crust.


Dough is mixed-up; now resting for 10 minutes before kneading.


 Dough has baked for about 6 minutes at 350 degrees until set.
Now we can top it!

Hot, cut and ready to eat!

 Enjoy! Thanks for stopping by! =)

Wednesday, March 23, 2011

Cream Puffs

There are very few cakes which are moist enough to suit my dad's taste.  So, many years ago, (probably even way before I was born...) my mom started making him cream puffs for his birthday instead of cake.  Since Dad's birthday fell on a weekday this year, and both he and Mom work, I decided to make the cream puffs so that Mom wouldn't have to worry about it.  Let me warn you...if you have never had cream puffs before, you are missing out on one of the great pastries of the world.  As Dad would say, they're so good, you can't hardly sit still and eat them.

Cream Puffs (Dough)

1 c. water
1/2 c. butter
1 c. all purpose flour
4 eggs

Preheat oven to 400 degrees. Heat water and butter to boiling point in saucepan.  Stir in flour and stir constantly over low heat until the mixture leaves the sides of pan and form a ball (about 1 minute).  Remove from heat and cool.  Beat eggs in, one at a time, blending well after each addition.  Mixture should be smooth and velvety.  Drop by generous spoon-fulls on an ungreased baking sheet. Bake in hot oven for about 45 minutes.  Puffs should be browned and dry to the touch.  Makes 8 large puffs.

Custard

1/2 c. sugar
1/2 tsp. salt
6 T. all purpose flour
2 c. top milk
2 eggs, or 4 yolks
2 tsp. vanilla
1 T. butter

Mix sugar, salt and flour in saucepan.  Stir in milk and  cook over low heat, stirring until it boils. Cook for 1 minute.  Remove from heat.  Transfer a little of this mixture into beaten eggs (or yolks), being careful to add mixture slowly while stirring vigorously .  Transfer egg mixture back into saucepan, stirring constantly.  Return to heat and bring to a boiling point.  Remove from heat, and blend in vanilla and butter.

After puffs have cooled, slice off tops (reserve) and scoop out soft filling. Fill inside of puffs with custard and replace tops.  Sprinkle powdered sugar over them if desired.

Spoon dough out onto ungreased baking sheet


 Puffs are done when golden brown and dry to the touch


Slice off tops (reserve) and scoop out filling


My bowl full of scooped-out filling


Fill each puff with custard, then replace tops


Ready to serve!
(As you can see, I made a double batch; it's one of the requirements of making them
for the family...)

Monday, March 14, 2011

Buttermilk Fried Chicken and Cornmeal Waffles

Mildred Pierce (Keepcase)I first heard about chicken and waffles in one of my favorite novels, Mildred Pierce by James M. Cain, one of the great noir masters. (You may have seen the 1945 film by the same name with Oscar-winner Joan Crawford--also one of my favorite film noirs.)  In the novel, Mildred opens her own restaurant and works her way up the social and financial ladder by specializing in selling chicken and waffles.  Ever since reading this, I've been intrigued by the idea.  After doing some more research, I learned that this seemingly-odd combination is actually pretty common fare in the South, and is also frequently prepared in other parts of the country as creamed chicken and waffles.  I figured it was worth a try, and was pleasantly surprised by the outcome.  Of course, nothing was new about the fried chicken, and nothing especially new about fixing waffles; however, these are cornbread waffles, so in that respect they are very different from any you would normally eat.  I also found in doing my research that many people actually make regular, breakfast-style waffles (which I have yet to try with this dish), but I do think the cornbread waffles are a nice change-up from the typical cornbread that I would otherwise make.

Nothing says "South" like chicken frying
in a cast iron skillet!
Buttermilk Fried Chicken

1 frying chicken, cut up
buttermilk (about 4-6 cups)
1 c. all purpose flour
1 T. salt
1 1/2 T. paprika
dash of pepper
about 2/3 c. oil for frying

Place chicken in container where all sides of each piece can be covered with buttermilk.  The amount of buttermilk needed will depend on the size of the chicken and the container in which it is placed. Cover with plastic wrap, place in refrigerator and allow to marinate at least 4 hours.  Preheat oven to 350 degrees. In a large bowl (or bag) mix flour, salt, paprika and pepper.  Place each piece of buttermilk-coated chicken in flour mixture and coat generously, being sure to cover entire surface.  In a large cast-iron skillet, heat oil over medium-high heat, until hot enough so that drops of water will sizzle when sprinkled onto it.  Place dredged chicken in hot oil, one piece at a time, making sure that no piece directly touches another. Do not overcrowd skillet. You will most likely have to fry the chicken in two or three batches.  Fry on each side about 5-6 minutes, or until golden and crispy, then transfer onto foil-lined baking sheet.  When all chicken has been browned and transferred onto baking sheet, place in oven and bake for about 35 minutes, or until juices run clear.

Cornmeal Waffles

3/4 c. all purpose flour
1/4 c. cornmeal
3 tsp. baking powder
1/4 tsp. salt
2 T. butter, melted (or use oil from skillet in which chicken was fried)
1 egg
2/3 c. milk

In a mixing bowl, combine flour, cornmeal, baking powder and salt.  Add butter or oil, egg and milk.  Stir until combined (batter will be lumpy).  Pour into hot, greased waffle iron, and bake until done.  Serve hot.

Buttermilk fried chicken, cornmeal waffles and green beans...welcome to the South!

Sunday, March 6, 2011

Mom-ma's Gingerbread

If you have ever had my grandmother's gingerbread, then you will understand when I say it clearly needs no introduction, and that whatever description I might give--however good--will still not adequately convey how absolutely delicious it truly is!
  

Mom-ma's gingerbread: the best you'll ever eat!

I also have several other recipes for "gingerbread" (most of which are of a cake-like texture and baked in a square cake pan), and recipes for gingerbread cookies, but this is a recipe for what one might describe as individual gingerbread cakes.  If you have read my "About Me" page, then you already know that gingerbread is one of Mom-ma's signature dishes.  Regardless of the fact that she's my grandmother (and I could, therefore, be somewhat biased), she makes the best gingerbread I've ever had...and I'm sure many of my family members would attest to that.

Like many breads, much of how this turns out will have to do with the handling of the dough, as opposed to how it's put together.  Try to handle it as little as possible, while still shaping it as necessary. Also, Mom-ma and I like our gingerbread very chewy and moist in the middle, so we usually pull ours out of the oven after about 10 minutes of baking.  However, if you prefer yours to be on the dry side, you will want to leave it in for about 12-14 minutes. Also, I will give you the recipe as Mom-ma gave it to me, which will make a lot of gingerbread (about 44 pieces), so I always half it when making it for just my husband and myself.

Mom-ma's Gingerbread

6 c. self-rising flour
3 tsp. (heaping) of ginger
3 eggs
1 c. granulated sugar
1 c. brown sugar
1 c. molasses
2/3 c. oil
1/2 c. water or milk
(plus 1 egg and about 3 T. milk for glaze)

Preheat oven to 375 degrees.  In large mixing bowl, combine flour and ginger. In separate bowl, combine eggs, sugars, molasses and oil.  In small bowl, beat additional egg with milk and set aside. Pour liquid into flour mixture and stir to combine. Make sure that it is well-blended, but do not over beat.  Pour dough onto a generously floured counter top.  Sprinkle with flour and be sure to keep flour on your hands so it does not stick. Roll into individual cakes and place about 1" apart on greased baking sheet.  Glaze tops with egg wash and bake for 10-14 minutes.  If you want gingerbread to be very moist in the center, start checking after about 10 minutes of baking, and take it out when it is still soft to touch.  If you want it to be dry, leave it in for about 14 minutes or until firm to touch. Remove from oven, place on cooling racks, and enjoy! Warning: you will want a tall, cold glass of milk to go with this!

Also: When making the gingerbread for the pictures below, I didn't have any plain molasses.  Not to worry, though: I did have blackstrap molasses. However, if used alone, blackstrap molasses would be entirely too dark and too rich to use by itself, and would basically ruin the bread.  So, I used 1/2 the amount of molasses the recipe calls for, and used honey for the remaining 1/2. This helped to balance out the flavor.  

You will need to be generous with the flour while shaping the dough as it is very sticky.


 Space individual cakes out about 1" apart on prepared baking sheet and brush with egg & milk wash.


Out of the oven and ready to cool (and eat!)


Get the milk ready!

Friday, March 4, 2011

Mom-ma's Homemade Biscuits

Mom-ma's Biscuits: my absolute favorite
Every cook makes biscuits differently.   If you put my grandmother's biscuits on a plate beside my mother's, I could instantly tell the difference, even though they're both delicious. Biscuits are sort of like a trademark...many people will recognize you for the bread you make (cornbread, especially, but I'll post about cornbread later...).  Like many other foods that are made from scratch, there are all kinds of ways to make biscuits, but the basic principle is always the same: flour + fat + milk + high heat = biscuits. 

Fortunately, I come from a good line of biscuit-makers (haha!): both of my grandmothers made heavenly biscuits, and my mom is also pretty darn-good at it. However, I find that I am constantly trying to perfect my own, as so much of how they turn out is in the handling. If my sisters stay with us, or my husband requests biscuits, I will usually ask "What kind do you want?" This means: Do you want Granny's biscuits, or Mom-ma's biscuits...etc.? 

Today, I'm going to give you Mom-ma's (my grandmother's) biscuit recipe. She makes my absolute favorite biscuits, which are incredibly light and delicately textured. They are just perfect no matter how you eat them!  One thing that's kind of different about Mom-ma's biscuits is the fat she puts in them.  Almost every biscuit recipe in a cookbook will call for shortening to be cut into the flour before the liquid is added.   What Mom-ma does differently than most is use oil instead of shortening. If you have always used shortening, I think you'll be surprised at how well the oil works. I think it also helps make for a lighter biscuit. Not only does using oil save time and effort (because you don't have to cut the oil in), but it's also healthier for you.

Mom-ma's Biscuits

2 c. self-rising flour
1/4 c. oil
3/4-1 c. milk
1-2 T. softened butter

Preheat oven to 450 degrees.  Place flour in mixing bowl, and add oil and milk.  Add only 3/4 c. milk at first, and add more as needed.  Dough should be very soft, but should still hold its shape.  Stir vigorously for about 10-15 seconds, but only until ingredients are combined. (Over-stirring will cause bread to be tough.) Place dough onto a floured counter top.  Sprinkle top of dough with flour, and be sure to coat fingers so dough will not stick.  Don't knead the dough, but simply pat-out until about 1/2" thick, then cut with a biscuit cutter.  Place onto ungreased pan and spread softened butter over tops of biscuits. (You could also just spray them with a quick blast of non-stick cooking spray.) Bake in hot oven (450 degrees) for about 8-10 minutes or until tops are delicately browned. Serve hot with favorite topping, or serve plain.
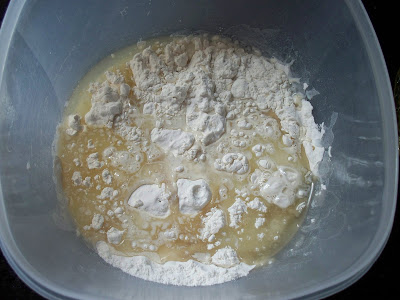

Mom-ma uses oil instead of shortening, which also saves time, because you don't have to cut it i.


Turn dough out onto lightly floured counter top, pat-out, and cut with biscuit cutter.

Place on ungreased pan, spread tops with softened butter, and bake at 450 degrees for 8-10 minutes.


Serve hot, plain or with favorite spread.


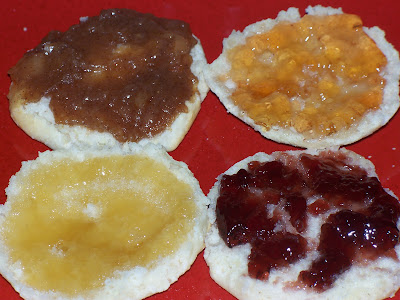
Top left to bottom right: apple butter, apple jelly, honey and blackberry jelly
(all homemade--except for the honey--it was locally made).
 These are excellent with anything: gravy, sausage, butter, jelly, apple butter, molasses, honey, or plain.  These biscuits are so good, and so light, you will be perfectly satisfied eating them with nothing but a cold glass of milk or a hot cup of coffee! Here in the South, biscuits aren't only a breakfast bread: they are often served with dinner, especially if the main course is fried chicken or ham.  Try them, and let me know what you think!

Monday, February 21, 2011

Best Blueberry Muffins

These blueberry muffins are the best I ever ate! I frequently get asked to make them for breakfast when my sisters visit.  They are super-easy to throw together and oh-so scrumptious!  Why buy muffins from the store when home-made ones are cheaper and tastier?

Even if you aren't much of a baker, these are pretty-much fool-proof.  If you don't like blueberries, you could substitute any other fruit of similar size. I have also made them with black raspberries and they were just as good. This recipe will make 12 average sized muffins. 


Best Blueberry Muffins

2  cups all-purpose flour
1/2 c. granulated sugar
3 tsp. baking powder
1/2 tsp. salt
1/4 c. oil
1 large egg
1 cup milk
1 cup blueberries


Preheat oven to 400 degrees. Grease a muffin tin or line with paper baking cups. (I suggest quickly spraying the paper liners with a non-stick baking spray.) In mixing bowl, blend flour, sugar, baking powder and salt. Add oil, egg and milk, and stir just until blended.  Carefully add blueberries and gently mix into batter.  Fill muffin cups until 2/3 full. Bake for about 20-25 minutes. Serve plain or with spread of your choice.

Since fresh blueberries are often out-of-season, and therefore very expensive, I keep a bag of frozen blueberries on hand to use whenever I want.  This not only prevents you from having to use the fruit before it turns, but the frozen berries are also easier to blend into the batter, as they are more resistant to "mushing-up."

Related Posts Plugin for WordPress, Blogger...