Tuesday, March 8, 2011

Aunt Danola's Baby Ruth Cookies

My Aunt Danola was an older sister to my grandmother, Hattie. She was truly a great lady whom I always admired; she really enjoyed a good laugh and always had a good story to tell. She had a chuckle that just made you feel good and would often begin a remark with, "Now, children..." They sure don't make 'em like Aunt Danola anymore.
  

Chewy and rich, salty and sweet,you'll want a tall,
cold glass of milk to go with these!

Like my grandmother, she was an excellent cook, and completely won me over about 15 years ago with her baked beans.  This cookie recipe was given to me by her son, Joel, and I promise you won't regret making them. (I would recommend, however, making sure there is milk in the fridge before you do.)


Aunt Danola's Baby Ruth Cookies

1 c. margarine
1 1/2 c. sugar
2 eggs
2 2/3 c. all-purpose flour
1 tsp. salt
1 tsp. baking soda
1 tsp. vanilla
3 large Baby Ruth bars, cut-up

Preheat oven to 375 degrees. In a large mixing bowl, cream margarine and sugar. Add eggs, and beat until creamy. In a separate bowl, combine flour, soda and salt; add to sugar mixture.  Add vanilla and Baby Ruth candy; stir until well-combined.  Refrigerate for 30 minutes, then drop by teaspoonfuls onto a greased cookie sheet.  Bake for about 10 minutes, or until tops are delicately browned. Remove from oven, and as soon as cookies have cooled enough to hold together, transfer them onto cooling racks. (This can be somewhat tricky, as any melted caramel from the candy will harden onto the cookie sheet as they cool.) Makes about 52 cookies.

I like to use a small ice cream scoop to drop cookies; this insures that they will be a uniform size,
and it allows you to skip the step of chilling the dough, since you don't have to handle it.  

Monday, March 7, 2011

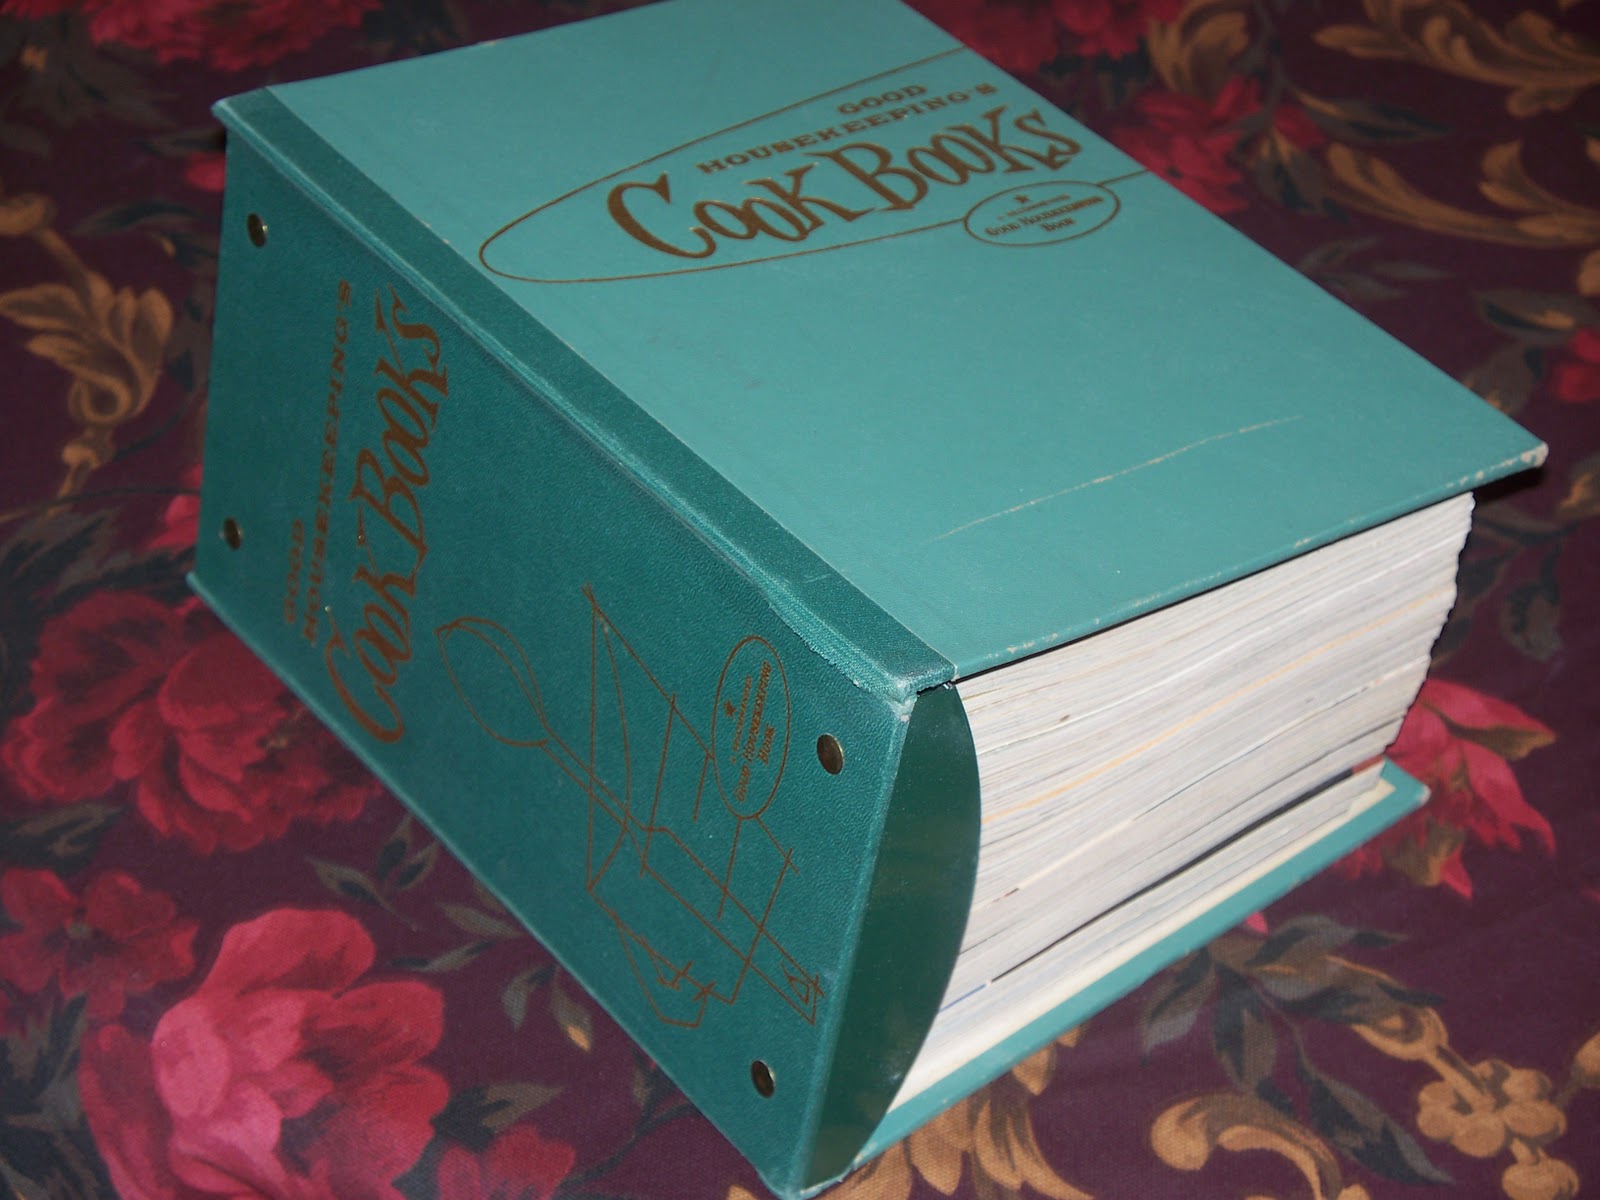
Is That a Cookbook--or What!!!

OK, so I'm going to embarrass myself a little here, but I'm so excited, I really don't even care if you find out   how big of a nerd I am! Haha! My "new" cookbook came today!  It feels like Christmas around here right now! (No; really--I was so excited, I actually called my poor husband at work to tell him that it came!....I know, I know...)

Is that a cookbook--or what!!! =)
I have been searching for some old cookbooks on eBay, and finally came across some that I really wanted. This is the first of the lot, and needless to say, the mother of them all! It is actually a binder with 20 of Good Housekeeping's Cookbooks contained within.  They are each about a specific type of food (i.e. "Good Housekeeping's Book of Cookies," etc.), and are from 1958. So you know what I'll be doing in my spare time for the next few days/weeks/months... =)

If anyone knows of any really good, vintage cookbooks, please let me know as I would love to add to my collection! (PS: I am expecting Betty Crocker's Party Book and Betty Crocker's Entertaining Guide any day now...)  =)

Sunday, March 6, 2011

Mom-ma's Gingerbread

If you have ever had my grandmother's gingerbread, then you will understand when I say it clearly needs no introduction, and that whatever description I might give--however good--will still not adequately convey how absolutely delicious it truly is!
  

Mom-ma's gingerbread: the best you'll ever eat!

I also have several other recipes for "gingerbread" (most of which are of a cake-like texture and baked in a square cake pan), and recipes for gingerbread cookies, but this is a recipe for what one might describe as individual gingerbread cakes.  If you have read my "About Me" page, then you already know that gingerbread is one of Mom-ma's signature dishes.  Regardless of the fact that she's my grandmother (and I could, therefore, be somewhat biased), she makes the best gingerbread I've ever had...and I'm sure many of my family members would attest to that.

Like many breads, much of how this turns out will have to do with the handling of the dough, as opposed to how it's put together.  Try to handle it as little as possible, while still shaping it as necessary. Also, Mom-ma and I like our gingerbread very chewy and moist in the middle, so we usually pull ours out of the oven after about 10 minutes of baking.  However, if you prefer yours to be on the dry side, you will want to leave it in for about 12-14 minutes. Also, I will give you the recipe as Mom-ma gave it to me, which will make a lot of gingerbread (about 44 pieces), so I always half it when making it for just my husband and myself.

Mom-ma's Gingerbread

6 c. self-rising flour
3 tsp. (heaping) of ginger
3 eggs
1 c. granulated sugar
1 c. brown sugar
1 c. molasses
2/3 c. oil
1/2 c. water or milk
(plus 1 egg and about 3 T. milk for glaze)

Preheat oven to 375 degrees.  In large mixing bowl, combine flour and ginger. In separate bowl, combine eggs, sugars, molasses and oil.  In small bowl, beat additional egg with milk and set aside. Pour liquid into flour mixture and stir to combine. Make sure that it is well-blended, but do not over beat.  Pour dough onto a generously floured counter top.  Sprinkle with flour and be sure to keep flour on your hands so it does not stick. Roll into individual cakes and place about 1" apart on greased baking sheet.  Glaze tops with egg wash and bake for 10-14 minutes.  If you want gingerbread to be very moist in the center, start checking after about 10 minutes of baking, and take it out when it is still soft to touch.  If you want it to be dry, leave it in for about 14 minutes or until firm to touch. Remove from oven, place on cooling racks, and enjoy! Warning: you will want a tall, cold glass of milk to go with this!

Also: When making the gingerbread for the pictures below, I didn't have any plain molasses.  Not to worry, though: I did have blackstrap molasses. However, if used alone, blackstrap molasses would be entirely too dark and too rich to use by itself, and would basically ruin the bread.  So, I used 1/2 the amount of molasses the recipe calls for, and used honey for the remaining 1/2. This helped to balance out the flavor.  

You will need to be generous with the flour while shaping the dough as it is very sticky.


 Space individual cakes out about 1" apart on prepared baking sheet and brush with egg & milk wash.


Out of the oven and ready to cool (and eat!)


Get the milk ready!

Saturday, March 5, 2011

Old-Fashioned Vegetable Soup

  
Hot and ready to serve with crackers, cornbread  or grilled cheese.

Anytime that we get sick (like now), and I start thinking about what to make for supper, soup is naturally the thing that comes to mind. If you've been reading my blog, you know that chicken noodle soup is my first go-to, but since I already shared that recipe, I thought I would make vegetable soup (my second favorite) and share it with you guys. Once again, the recipe is really only a guide; feel free to add to or take away from it as you see fit. Also, this recipe makes a large cooker full, so if you're cooking for only 2-3, you will probably want to half this.

Old-Fashioned Vegetable Soup

2 celery ribs, diced, plus tops
2/3 c. onion (or just less than 1/2 medium onion), diced
2 small carrots, split and cut into uniform pieces about 1/4" long
2 T. oil
4 medium potatoes, cut into small, uniform cubes, about 1/2" wide
1/2 small head of cabbage, shredded
2 1/2 c. frozen vegetables (choose whatever you like, but I suggest at least including peas and corn)
24 oz. tomato sauce (3 c. or 3-8 oz. cans)
4 c. water
4 beef bouillons
1/2 T. sugar
7-8 dashes Worcestershire sauce (about 1/2 T.)
1 1/2 tsp. salt
3/4 tsp. coarsely ground black pepper
2 tsp.dried parsley

Prepare and cut all vegetables as indicated.  Heat the oil in a large cooker, and saute celery, onions and carrots until tender, but not browned. (Reserve celery tops.)  Add all other vegetables and tomato sauce.  Dissolve beef bouillons in water, then add to cooker. Add remaining ingredients, and stir to combine. Place reserved celery tops on top of soup, cover with lid, and simmer for about 30 minutes. Remove celery tops before serving, and serve hot with crackers, cornbread or grilled cheese.

After all ingredients have been combined, add celery tops, cover with lid, and simmer
for 30 minutes.
(Don't you just love those colors!?)


 This is how it should look after cooking for 30 minutes.  Notice the color isn't as
brilliant due to the vegetables having cooked into the broth.

Friday, March 4, 2011

Mom-ma's Homemade Biscuits

Mom-ma's Biscuits: my absolute favorite
Every cook makes biscuits differently.   If you put my grandmother's biscuits on a plate beside my mother's, I could instantly tell the difference, even though they're both delicious. Biscuits are sort of like a trademark...many people will recognize you for the bread you make (cornbread, especially, but I'll post about cornbread later...).  Like many other foods that are made from scratch, there are all kinds of ways to make biscuits, but the basic principle is always the same: flour + fat + milk + high heat = biscuits. 

Fortunately, I come from a good line of biscuit-makers (haha!): both of my grandmothers made heavenly biscuits, and my mom is also pretty darn-good at it. However, I find that I am constantly trying to perfect my own, as so much of how they turn out is in the handling. If my sisters stay with us, or my husband requests biscuits, I will usually ask "What kind do you want?" This means: Do you want Granny's biscuits, or Mom-ma's biscuits...etc.? 

Today, I'm going to give you Mom-ma's (my grandmother's) biscuit recipe. She makes my absolute favorite biscuits, which are incredibly light and delicately textured. They are just perfect no matter how you eat them!  One thing that's kind of different about Mom-ma's biscuits is the fat she puts in them.  Almost every biscuit recipe in a cookbook will call for shortening to be cut into the flour before the liquid is added.   What Mom-ma does differently than most is use oil instead of shortening. If you have always used shortening, I think you'll be surprised at how well the oil works. I think it also helps make for a lighter biscuit. Not only does using oil save time and effort (because you don't have to cut the oil in), but it's also healthier for you.

Mom-ma's Biscuits

2 c. self-rising flour
1/4 c. oil
3/4-1 c. milk
1-2 T. softened butter

Preheat oven to 450 degrees.  Place flour in mixing bowl, and add oil and milk.  Add only 3/4 c. milk at first, and add more as needed.  Dough should be very soft, but should still hold its shape.  Stir vigorously for about 10-15 seconds, but only until ingredients are combined. (Over-stirring will cause bread to be tough.) Place dough onto a floured counter top.  Sprinkle top of dough with flour, and be sure to coat fingers so dough will not stick.  Don't knead the dough, but simply pat-out until about 1/2" thick, then cut with a biscuit cutter.  Place onto ungreased pan and spread softened butter over tops of biscuits. (You could also just spray them with a quick blast of non-stick cooking spray.) Bake in hot oven (450 degrees) for about 8-10 minutes or until tops are delicately browned. Serve hot with favorite topping, or serve plain.


Mom-ma uses oil instead of shortening, which also saves time, because you don't have to cut it i.


Turn dough out onto lightly floured counter top, pat-out, and cut with biscuit cutter.

Place on ungreased pan, spread tops with softened butter, and bake at 450 degrees for 8-10 minutes.


Serve hot, plain or with favorite spread.


Top left to bottom right: apple butter, apple jelly, honey and blackberry jelly
(all homemade--except for the honey--it was locally made).
 These are excellent with anything: gravy, sausage, butter, jelly, apple butter, molasses, honey, or plain.  These biscuits are so good, and so light, you will be perfectly satisfied eating them with nothing but a cold glass of milk or a hot cup of coffee! Here in the South, biscuits aren't only a breakfast bread: they are often served with dinner, especially if the main course is fried chicken or ham.  Try them, and let me know what you think!

Wednesday, March 2, 2011

Homemade Pot Roast

Like many basic dishes, there are about a gazillion ways to make a roast. Every cook has her own way of doing it, and chances are, she will change just a little something every time she makes it.  Like many others, I hardly ever make one the exact same way twice.  However, this is a good recipe from which you can take away or build on as you see fit:


Pot Roast

3-4 lb. roast (bottom round)
4 medium potatoes, cut into about 1x1" pieces
4 medium carrots, split and cut into 1" pieces
1 medium celery rib, cut in half
1 medium onion, sliced into about 12 equal portions
4 cloves of garlic, crushed
1 tsp. dried parsley
1 bay leaf
6-7 dashes of Worcestershire sauce (about 1/2 Tablespoon)
1 can of French Onion soup
1 tsp. salt
1 tsp. coarsely ground black pepper
2 T. oil
1/2 c. of water

Preheat oven to 325 degrees.  Sprinkle 1/2 tsp. of salt and 1/2 tsp. of pepper over all sides of roast. In a large, oven-proof Dutch oven, heat oil over medium high heat.  Place roast in Dutch oven, and brown on all sides (about 6-9 minutes). Combine potatoes and carrots in separate mixing bowl, and sprinkle with remaining 1/2 tsp. salt and remaining 1/2 tsp. pepper. Mix to season potatoes and carrots. Place onions on top of roast, then add potatoes, carrots and garlic.  Pour French Onion soup directly over meat and vegetables, add Worcestershire sauce and water. Sprinkle with parsley, add bay leaf, and place celery on top. Cover with lid and place in oven.  Cook for about 1 1/2 hrs, removing lid for last 30 minutes of cooking.  Remove bay leaf before serving and serve hot.

Egg & Muffin Breakfast Sandwiches

  OK: I'm not an expert on copyright, but I'm pretty sure I can't use the famous food chain's name for this breakfast sandwich because that would be trademark infringement or something; but you probably know what I'm going for here...hopefully.
  
First of all, if you love bread and have never tried an English muffin, you must! They are my favorite pre-made breakfast item (unless you count cereal...) And they are a great, quick breakfast bread. The texture is so much better than toast, and they're perfection when simply toasted and topped with homemade jelly. You can get them at practically any grocery store (I bought 12 for $1.99 at Kroger!) However, if you would like to eat something a little heartier than just a muffin with jelly, try making an egg and muffin sandwich!  They're delicious (not to mention cheap and easy)!   
Egg and muffin sandwiches are a great and easy way to start the day!

Egg & Muffin Breakfast Sandwich

1 English muffin
1 egg
1 slice of American cheese
1 slice of Canadian bacon
butter or buttery spread
nonstick cooking spray
dash of salt
dash of pepper


Split and toast the English muffin.  While the muffin is toasting, heat a small skillet that has been sprayed with nonstick cooking spray over medium high heat.  When hot, break the egg into the skillet and fry for about 2-3 minutes, or until it holds together enough to flip over. Dash with salt and pepper before turning.  Flip the egg, break the yolk, and dash with salt and pepper.  Place the Canadian bacon on top of the egg and continue frying until done (about 2-3 more minutes).  Add the slice of cheese during the last minute of frying so it will melt.  Spread the toasted English muffin with butter or buttery spread, and place the egg so that it is situated between the layers of the muffin. Cut in half if you wish. Serve hot!
Related Posts Plugin for WordPress, Blogger...